前端框架 React:生命週期
constructor 的作用
在 React 開發中有一個很重要的叫做 lifecycle
什麼時候產生、更新、結束等。
這邊要介紹怎麼產生。
我們可以在 app 裡面寫入:
然後測試之後,會發現當網頁讀取成功之後就印出了。 App created
然後另外再新增一個 class Title 然後測試,
也會看到印出 Title created / App created
—
接下來要測試一個切換值,設置一個 button 之後,然後設定點擊改值的部分。
除此之外針對標題要不要顯示的部分,使用短路的效果,達成判斷的功能效果類似 isShow === true && <Title /> 。JS 短路參考資料
主要是在這邊不能使用 if(判斷式),這時候就必須要使用 JavaScript 短路的性質。
通過這樣子,就可以在按下按鈕就可以發現到有沒有經過 class Title 的 constructor()
流程如下:
- 剛開始開頭是 true,所以就會 render title,所以 Title component 就被建立了。印出 title created
- 當點下按鈕之後,isShow 就變成 false,狀態改變了,所以也重新 render。
- 而這時候 isShow 已經變成 false,所以碰到
<Title />這行就會跳出,所以也不會建立 Title component,title 的字樣就不會被 render 出來
當 Title component 被取消了之後,就會又需要重新建立過才會出現這個 Title component。
另外一種寫法是利用 CSS 的方式,一樣是引入內部,只是加上一個值,把這個值傳給 class Title
不過這種方式的話 Title component 就不會被取消,因為這種方法只是使用 CSS 的方式而已。當然就不需要被重新建立。
這兩種方法的差異就在於一個 component 一直都在,另外一個則是會需要重新建立。
constructor 的用意就是當需要繼承一些值得時候,或是需要印一些 log 的時候,就會需要用到。而一般來說,一個 Component 並不一定會需要 constructor
class Title extends Component {
  constructor(props) {
    super(props) // 原本來說,要繼承資料是都要這樣子寫才可以
    console.log('Title created')
  }  render(){...}
}class App extends Component {
  ...
  {isShow && <Title isShow={isShow} />}
}
所以說,實際上在繼承的時後,都會自動加上 props 的值,所以才會沒寫也一樣都會執行。
不過有時候可能會產生一些 bug,像是如果 constructor 有傳入,而 super 沒傳入,就會發生錯誤。
class Title extends Component {
  constructor(props) {
    super()
    console.log(this.props)
  }  render(){...}
}// undefined
所以最好的建議就是把每個 constructor 跟 super 都填好填滿 props
小結:
constructor 是在 component 建立的時候,最自動幫你執行的 function,所以如果沒有要做任何事情的時候,可以不用寫 constructor。但如果有這個需求,記得要把寫好寫滿 constructor(props) 、 super(props) 這樣才可以確保東西都有初始化好。
另一點是當需要隱藏一些東西的時候,就需要透過 CSS
或是使用 isShow && <Title /> 的語法,這是一個 React 常常用的方法。
shouldComponentUpdate
首先使用已經建立好的範例:
這個範例就是當點下之後,就會改變值,然後就會自動重新 render 對應的部分。
現在要講的就是一個決定這個 component 是不是應該被 update 了
shouldComponentUpdate() {}
他呼叫的時機點是在 state 被改變後才被呼叫意思就是:
1. change state
2. shouldComponentUpdate()
3. render
意思就是在 render 以前會被呼叫的函式,而如果沒有寫這部分,預設就是回傳 true。
shouldComponentUpdate() {
  return true;
}
這個部分會決定要不要呼叫 render function,只有回傳 true 的時候,才會執行 render,所以如果把這個 shouldComponentUpdate() 的回傳結果改成 false 就不會重新 render 了。
shouldComponentUpdate() {
  return false;
}
這樣子點擊的時候,就不會產生 render 的效果
這邊會傳兩個參數一個是 nextProps 、 nextState 也就是會傳入下面要變成什麼樣子,可以決定要不要 render
shouldComponentUpdate(nextProps, nextState)
 console.log(nextState)
  if (nextState.number === 3) {
    return false;
  }
  return true;
}
這是因為達成條件之後,就 reutrn flase,所以就不呼叫 render 了。
這個的用途就是在一些場合可以使用。舉個例子,假設有一個 Component A底下,還有另外一個 Component B,而上層的 Component A 改變了,而 Component B 沒需要改變的時候,就可以運中這個來阻止變化。
import React, { Component } from 'react';class Title extends Component {
  shouldComponentUpdate(nextProps) {
    if (nextProps.title !== this.props.title) {
      return true;
    }
    return false;
  }
  render() {
    console.log('title render')
    return <h1>{this.props.title}</h1>
  }
}class App extends Component {
  constructor(props) {
    super(props)
    this.state = {
      number: 1
    }
  }  render() {
    const { number } = this.state
    return (
      <div>
        <h1>{number}</h1>
        <Title title={'hello world'} />
        <div onClick={() => {
          this.setState({
            number: this.state.number + 1
          })
        }}>click me</div>
      </div>
    )
  }
}export default App
通過使用 shouldComponentUpdate 就可以阻止不必要的 render
然後因為只是 re-render 而已,所以還有一個重點是沒必要使用太複雜的比較,如果用了太複雜的比較的話,說不定比較浪費的資源會比 re-render 的資源還多,所以優化實際上沒這麼好做,很多時候都還是要多重比較比較好。
componentDidMount 與 componentWillUnmount
componentDidMount
Mount 是掛載的意思
什麼是 DidMount 就是 component 在建立的時候會呼叫 constructor,但建立歸建立並不會馬上就 render 到 dom 上面,所以只有當 componentDidMount 被觸發以後,他才真的出現在 dom 上面
經由下面的測試之後,就可以得知,只有當 componentDidMount 才會建立 DOM
import React, { Component } from 'react';class Title extends Component {
  render() {
    return <h1>hello</h1>
  }
}class App extends Component {
  constructor(props) {
    super(props)
    this.state = {
      showTitle: true
    }
    console.log('created', document.querySelector('.test-app'))
  }  componentDidMount() {
    console.log('mount', document.querySelector('.test-app'))
  }
  render() {
    const { showTitle } = this.state
    return (
      <div>
        <div className='test-app' onClick={() => {
          this.setState({
            showTitle: !this.state.showTitle
          })
        }}>toggle</div>
        {showTitle && <Title />}
      </div>
    )
  }
}export default App
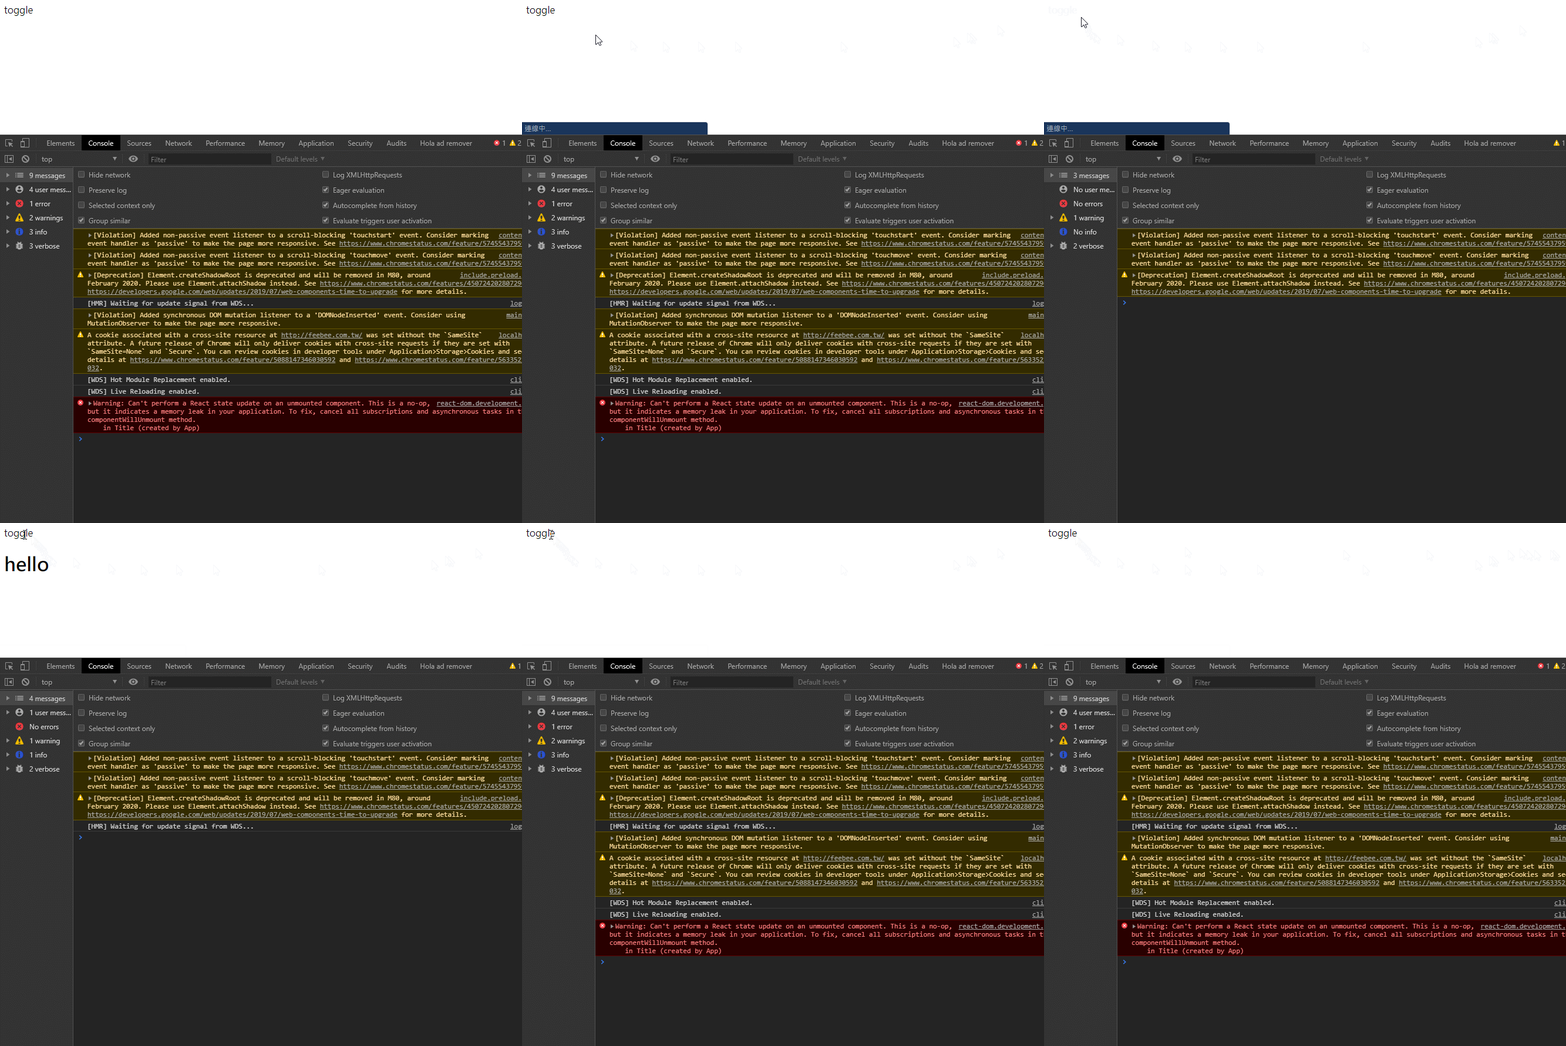
從印出的部份就可以觀察到。

所以這個最適合的就是用來做一些初始化的部份
然後再來測試另外一個例子:
import React, { Component } from 'react';class Title extends Component {
  constructor(props) {
    super(props)
    this.state = {
      title: 'hello'
    }
  }  componentDidMount() {
    setTimeout(() => {
      this.setState({
        title: 'ya!'
      })
    }, 2000)
  } // 通過這樣寫,就可以讓 title 在兩秒之後改變  render() {
    return <h1>{this.state.title}</h1>
  }
}class App extends Component {
  constructor(props) {
    super(props)
    this.state = {
      showTitle: true
    }
    console.log('created', document.querySelector('.test-app'))
  }render() {
    const { showTitle } = this.state
    return (
      <div>
        <div className='test-app' onClick={() => {
          this.setState({
            showTitle: !this.state.showTitle
          })
        }}>toggle</div>
        {showTitle && <Title />}
      </div>
    )
  }
}export default App
通過這個例子可以發現,過了兩秒之後,畫面就改變

但這邊會有一個問題,假如我在他切換之前就把這個 DOM 關閉的話呢?


這是因為在呼叫 setState 的 callback 之前,就沒了那個 DOM 元素,所以就會產生錯誤,因為不能去改變一個已經不見的 Component 的值。
這時候就需要下面的 function 了。
componentWillUnmount
unmount 是卸載的意思
DidMount 是已經 Mount 之後了,而這個 WillUnmount 就是 Unmount 之前,所以他正要 Unmount,也就是說當這個 Component 被卸載的時候,就會呼叫這個 function,所以就可以利用這個 function 在這裡把正要建立的部份清除,就不會發生錯誤。
import React, { Component } from 'react';class Title extends Component {
  constructor(props) {
    super(props)
    this.state = {
      title: 'hello'
    }
  }  componentDidMount() {
    this.timer = setTimeout(() => {
      this.setState({
        title: 'ya!'
      })
    }, 2000)
  } // 通過這樣寫,就可以讓 title 在兩秒之後改變  componentWillUnmount() {
    console.log('will unmount')
    clearTimeout(this.timer)
  }  render() {
    return <h1>{this.state.title}</h1>
  }
}class App extends Component {
  constructor(props) {
    super(props)
    this.state = {
      showTitle: true
    }
  }render() {
    const { showTitle } = this.state
    return (
      <div>
        <div className='test-app' onClick={() => {
          this.setState({
            showTitle: !this.state.showTitle
          })
        }}>toggle</div>
        {showTitle && <Title />}
      </div>
    )
  }
}export default App

componentDidUpdate
通過這個範例來測試,這是一個有個三個按鈕,每一種按鈕都會添加數量的一個簡單網頁。
假設我今天希望可以在透過印出資料的方式來測試,我們就會分別在三個 function 都分別放入 console.log,但這種做法會造成一種麻煩,就是當今天需要多加一個水果的時候,會變成很麻煩,又要一個一個改。
那這種時候,就可以另外拉出一個 function log 來使用,如前面例子所呈現的那樣子。
然而,這時候測試會發現,居然 log 出來的跟實際數量不一樣!?

這是因為 .setState() 是非同步的,所以 .setState() 還沒執行完成就已經到了印出的部分,所以會印出原本的資料。就會沒辦法確保拿到的是已經執行完畢的 state。
所以 .setState() 提供了第二個參數就是 callback function,這個 callback function 就可以在執行完成之後才呼叫。所以就可以把印出的部分放入第二個參數。
addOrange() {
  this.setState({
    orange: this.state.orange + 1
  }, this.log) // 不加括號就變成 callback
}
但是這樣子還是有個小問題,就是說當今天需要多一種水果,我除了要新增一個監聽 function 之外,還需要再設置 .setState 而且還要記得新增一個 this.log 來當作 callback ,所以每次我新增一個水果的時候,this.log 都要出現。
這種時候就可以換個角度來想,我們是什麼時候才會需要印出 this.log ?
當水果數量不一樣的時候,也就是說 state 改變的時候。
這時候就可以用到 componentDidUpdate,這個是在當 stat 改變的時候,就會呼叫這個 function,所以我們就可以使用。
另外需要注意的是 componentDidUpdate 會被 shouldComponentUpdate 影響,只要 shouldComponentUpdate 回傳 false,componentDidUpdate 也不會被執行。最主要原因是因為 shouldComponentUpdate 執行之後是 render 再來才是 componentDidUpdate。參考這篇的圖
所以我們就可以利用這個 function 來檢查,是否要印出資料。
componentDidUpdate(prevProps, prevState) {
  if (prevProps.apple !== this.state.apple
    || prevProps.orange !== this.state.orange
    || prevProps.banana !== this.state.banana
    ) {
      this.log()
  }
}
這邊會需要檢查是因為當初預想的是我們只要檢查水果而已,所以如果 state 多了不是水果的東西,不檢查就會也會觸發印出,所以才會多寫檢查。
其他生命週期
在官網有一個非常好的圖可以參考:
除了上述介紹的那些之外,還有更多的可用 function

可以看到有分三種 Mounting、Updating、Unmounting
Mounting 會建立 Component,執行順序就圖如同上那樣。
而當更新資料的時候則是按照 Updating 的順序執行。
當 Component 被刪掉的時候,順序就是按照 Unmounting
上述圖片是最常用的三個,除此之外還有更多:

在使用上也有分好幾個階段,可以看到左邊的 phase 的部份,最主要有分 Render phase 跟 Commit phase。從這邊就可以得知道,之前有一個範例是在 constructor 裡面取得 DOM 卻沒有,就是因為這邊的機制的關係,只有當達到 Commit phase 的時候才可以選取得到 DOM
總結:
Lifecycle method 有非常多種方法,都跟 render 有著不可分割的關係,透過這些方法我們可以在 render 上面有著更良好的控制。
至於控制這些可以幹麻,我想就是針對一些效能上的用途吧?畢竟現在的網站愈來越複雜,不再像是以前那樣子很簡單了。
通過這章節的理解,也可以對於 React 的 render 是怎麼樣的情況有著更清楚的理解。
